|
Launchpad ET12/11b
Course Description
Introduction
to Interactive Media is a class created for students interested in
the computer as a tool for digital illustration, imaging, editing, computer
animation and interactive media presentation on the web, or via CD-Rom
or DVD. This class will help students develop a solid understanding of
how computer graphics and interactive media is created and presented.
The class will introduce
a number of different graphics applications used by digital artists in
graphic design studios, post-production houses, motion picture and animation
studios, and website / interactive media development studios. Students
will also learn the overall functions of computer hardware and software,
become familiar with computer operating systems and the user interface,
and learn to develop professional habits with regard to naming, using,
storing and transfer of digital data.
Pre-requisites
ET11b is
open to all Launchpad Program students. Some prior knowledge or experience
with computer usage is prefered,
but not required. Those with the least computer/graphics experience will
need to spend the most time outside of the class to keep up and complete
assignments.
Lab time (outside
of class) is required, and failure to spend additional time
on projects and assignments will probably cause those students to fall
behind or produce poor quality work and possibly risk failing the course.
Textbooks:
Required:
Flash MX, A Visual Quikstart Guide, Peachpit Press;
|
|
Required:
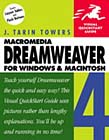
Dreamweaver MX (or 4), A Visual Quikstart Guide, Peachpit Press; |
|
|
 |
 |
...or
other Flash manual you may already have or prefer;
 |
|
...or
other Dreamweaver manual you may already have or prefer
 |
| The
above books are available at the AET bookstore, any retail bookstore,
or online from Amazon.com, ect. |
- Also Recommended:
The
Complete Guide to Digital Imaging by Joel Lacey;
|
|
Required:
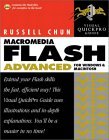
Flash MX Advanced, A Visual QuiksPro Guide, Peachpit Press; |
|
|
 |
 |
...or
other similar introductory graphic / digital design handbook
|
|
|
| The
above book is available online from Amazon.com, ect. |
Materials Needed
- 1 Zip Disk (100
MB IBM PC formatted)
- Pen for Wacom
pad (optional)
Download
Free Trial version of Adobe Photoshop, Illustrator and other Adobe products
Schedule
|
|
Intro
to Computer Graphics and Interactive Media
What is digital art?
How is digital art and interactive media presented?
Various types of digital art, animation and interactive media.
Introduction
of Students and Instructor.
Registration Issues.
Classroom and Lab rules and procedures.
Understanding
Computer Hardware and Software
Computer components and what they do.
Storage and memory.
Visual display of computer graphics / animation.
Platforms and operating systems: PC and MacIntosh.
Organization, naming and transport / storage of files.
File sizes / types
This
week's advice: Get your books and supplies; look at digital
art, websites and interactive media for inspiration.
Resource site
of the week: Adobe
Expert Center
Homework:
Not Yet
|
|
|
Introduction
to Adobe Photoshop
Starting
from scratch: creating a new digital image file PSD (Photoshop Doucment)
Photoshop 6's User Interface
- setting image size: pixel (or other) dimensions, pixels-per-inch
/ dpi, color mode, and background
options. Images for the web and computer animation should
be 72ppi, RGB; for print 150 - 300dpi (or more!) CYMK.
- the 'Toolbox': Photoshop tools and
their options (Options Bar)
-
Photoshop Menus
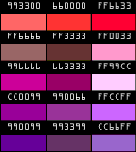
- Palettes: color 'sliders' and swatches,
Layers-Channels-Paths, History, Info palettes
- Text: Character palette; editible
vs. rasterized type
-
choosing and creating Brushes
 Saving
a file Saving
a file
- use the SMC computer's "E drive" for the initial SAVE,
copy the file to your Zip disc (memory permitting!)
- Photoshop version ??
- "Save As"
- "Save a Copy"
More about Color
- RGB / CYMK
- The
Color Wheel & Color Theory
-
Primary, Secondary, Tertiary
- Hue and Value, Tint and Shade
- Contrasting Schemes
- "Web-safe
Colors: "hexadecimal"
A
first look at Photoshop "Filters"
- They are cool!... but don't overuse them.
- the illusion of depth / 3-Dimensionality
CLICK
HERE to get your photos for the "fantasy" Photoshop composite
assignment...
|
|
Week
2.1
|
Getting
Familiar with Adobe Photoshop:
Aquiring
source material
Getting
images from the web
- "save image as..." & "download image to disc"
Screen
Capture on a PC
- "Print
Screen" key
- from the Clipboard into Photoshop
Using
a Scanner with Photoshop (CLICK HERE)
- Import > "Twain" (Aquire)
- The Scanner window and its settings
- Selecting optimum PPI (pixels per inch)
- Preview and scan area selection
- saving & using the scanned image
Image
manipulation:
how to get exactly what you want from
source material
- image extraction techniques: Lasso tool,
Magic Wand, and the Pen
tool (best)
- Working with Pen tool points,
and "Bezier" curves/handles
Saving and using Paths
More
about Layers
- Layer Modes and Opacity
/ Alpha
- Color adjustment
- Layer Transform
- Adjustment Layers
- Text Layers
Getting
deeper into Filters:
The good, the bad and the ugly
Putting
it all together: Image Compositing with Photoshop
Due
Week 3.1> Class Assignment #2 ( Photoshop assignment): Create
a CD cover for a real or imaginary music artist.

Click
to see full-size example
|
|
|
Creating
Vector Graphics with Adobe Illustrator
"Vector"
vs. "Bitmapped"
- Vector graphics
(Illustrator) are based on mathmatical coordinates (x,y, ect.)
- Bitmapped images (Photoshop) are made up of individual pixels
of color.
- Therefore, when using vector coordinates to describe placement
and display of shapes, lines and colors, file size does not increase
when an element is 'scaled' up -- even to a very large size. With
a bitmapped image, scaling an image up to 'double' its size results
in a four-fold increase of pixels (and therefore memory) used. Additionally,
with vector-based imaging, "anti-aliasing" is not used,
as edges and lines are perfectly smooth (neither created from square
pixels nor resolution dependent) at any size.
Using
Illustrator to design a Business Card
- Sketch possible logo designs on paper
before creating them on the computer.
- Standard Business card size is 3.5"
x 2"
- Determine the text elements you wish to include: company name,
your name, title, address, phone number, e-mail address, ect.
- if you intend to include a photographic or bitmapped background
or element in your card, it should be pre-prepared in Photoshop
at 300 dpi and at the appropriate size for placement in the Illustrator
file.
CLICK
HERE for detailed instructions
The
Heart of Illustrator
Graphics created in Illustrator are ultimately
combinations of individual, yet independent, colored shapes and
lines.
- Working with Pen tool points,
and "Bezier" curves/handles
along with the Pathfinder for cutting
and combining shapes, will allow you to achieve excellent results
with this program.
- Many of the skills and sensitivities developed using Photoshop
can be applied to Illustrator, but because of the inability to blend
pixels and apply filters, these two programs are inherently different.
Due
Week 3.2> Class Assignment #3 (Illustrator assignment): Create
your own Business Card
|
|
Week
3.1
|
 Flash:
what can it do, and how does it do it? Flash:
what can it do, and how does it do it?
What is vector based drawing?
The Flash interface.
Drawing with Flash: the tools that make lines, shapes, colors
and text.
Creating "symbols": graphics, movie clips,and buttons.
The "library".
Using the layers: locking, hiding, outlines.
Organization: naming symbols, layers, and instances before
you get overwhelmed.
Naming your files and projects.
Using
gradient fills to simulate 3-D in vector art.
Creating
high-quality images with the Flash drawing tools.
Color and transparency effects.
Text and fonts: "breaking apart" text and file size
issues. Cross browser capability.
Frames
and animation: "keyframes", frame-by-frame animation,
tweening.
Moving,
scaling, and rotating "instances".
Copying
and pasting visuals (frames) from scene to scene, or frame to
frame.
This
week's advice: Read your book, use the "online reference
manual", lock layers that you are not working on, name items
as you create them, do not animate (move, zoom in/out, fade in/out)
anything bigger than quarter-screen.
 Due
Week 4.1> Class Assignment #4: Create
an object using only the Flash Tool Pallet and Modifiers. This
can be an object that could serve as an interface or navigational
guide. It should be as realistic as possible. Examples: Vehicles,
machinery, appliances, tools or
musical instruments. Due
Week 4.1> Class Assignment #4: Create
an object using only the Flash Tool Pallet and Modifiers. This
can be an object that could serve as an interface or navigational
guide. It should be as realistic as possible. Examples: Vehicles,
machinery, appliances, tools or
musical instruments.
Cool site
of the week: David
Gary Studios
|
|
|
*CLICK
HERE for "Rotating Spheres" Instructions & Demo
The elements of high quality Flash production
Sound effects: using SoundForge to create loops and optimize
effects sounds.
Importing sounds and adding them to symbols or timelines.
Using bitmapped images in Flash: size matters!
The "Trace Bitmap" fuction.
File size for web delivery: our goal is 100k for a short intro piece,
web "page" or section.
Using
multiple Scenes for interactivity
Adding, naming and organizing Scenes.
Creating Buttons for movie navigation and interactive selection.
Frame Actions for movie / scene control; and Button Instance
Actions for navigation and interaction.
Duplicating Symbols in the Library, and other ways to create stages
of Instances or Buttons.
Online resources available to Flash producers:
This
week's advice: Keep reading your book, make your images or characters
as good as they can possibly be: simple is O.K. if it has style,
choose your "export movie" settings carefully, use the
resources that are available on the web for inspiration and education.
My favorite internet cartoon series is "Zombie College"
at Icebox.com
Due
Week 4.2> Class Assignment #5: Create a cool "logo
animation", with sound, for an intro to your final project.
Cool site of
the week: Yellow Submarine
|
|
|
Laying
out a Flash website / Introduction to "With" action (formerly
"Tell Target")
Naming
instances and the effect of keyframes on instance actions.
Preparing a Movie Clip to receive a With / Tell Target command.
Controlling the movie's Time-line with the With "_root"
command.
Mouse Event options and "Go to... and Play/Stop"
Tell Target's use as a Button Instance action or a Frame Action.
'Telling' multiple Targets; Targets 'Telling' Targets.
Making sophisticated Buttons, with sounds, motion and interactivity.
Creating Symbols specifically for use as Interactive Menus.
More Button Issues; sometimes you have to 'fake' it.
*JAMESREILLY.COM was made with many "Tell Target" actions:
This
week's advice: Do not settle for low quality graphics. Unless you
INTEND to include "stick figures" or childish artwork
in your Flash pieces, take the time to create high-quality visual
elements. Use books, photographs, ect. as reference material. Cartooning
is great, and is a special skill that must be learned. Even with
interface design, quality is paramount. Whether the look you want
is "Tooney" or faux 3-D, do it as good as possible, or
don't do it at all!
Due
Week 5.1> Class Assignment #6
Part 1: Create
a simple "Tell Target" menu / scene which displays "sub-menus"
on user interaction for information display (just the menu; it does
not need to display information).
Part 2: Make an outline, or "Storyboard"
of the information you will present in your final project.
An
extremely slick site: 2advanced.com
|
|
|
"With
_root": the foundation of interactivity in Flash
Finalizing
the mini Flash websites
Using "Mask" Layers
Masking multiple layers to create a cleanly 'cropped' SWF movie.
Creating a Loading Loop with the "If Frame is Loaded..."
action.
Multiple Loading Loops, and 'Game' Loading Loops.
Outputting Flash movies for display in browsers.
"Make Movie" settings; bitmap quality;, sound compression.
Using the "Bandwidth Profiler" to assist in file size
reduction.
Flash's "Publish" function: building a basic HTML page.
"Publish Settings"
Taking the next step with an HTML editing program such as 'Dreamweaver'.
Building an interlinked Flash driven website with the "Get
URL" action.
*Check out this sample of a more complicated "With _root"
scene:
This
week's advice: As your projects get more sophisticated, and complicated,
Pre-planning or Storyboarding becomes a neccessity. Designing on
the computer screen will ultimately result in an inferior product.
Don't be afraid to sketch out your ideas on paper. This will help
you pre-inventory which Symbols you must create within Flash, and
what must be created in other programs to be imported (bitmapps,
sounds, ect.)
Homework:
Complete your "mini" Flash website (using your logo
animation as its intro),
An
interesting "Hybrid" site: giger.com
|
|
Week
5.1
|
Composition
of a Web Page
A web page is composed of the following elements:
- The
HTML file, which describes the page layout, defines links to other
web pages, and contains the text for the page
- Elements
that come from the same server, or a different server Image files
(.gif, .jpg, .png) Audio files (.mp3, .au, .ram, .mov)
- Other
multimedia objects (QuickTime movies, Flash, etc.) JavaScript
Introduction
to Dreamweaver
Dreamweaver Windows:
Launcher.
This window is used to launch the other Dreamweaver windows.
Document
Window. This window shows you what the web page will look like
- more or less. It is also the place where you can place text,
images, and other elements. Any changes you make here will be
automatically reflected in the HTML Window.
HTML
Inspector. This window shows the raw HTML. You can write HTML
directly in this window, and any changes you make will be reflected
in the Document window when you switch to the document window,
or perform a Save (control-s for PC or command-s for mac).
Properties
Inspector. This window is one of the most important and is used
to show and set any properties of the currently selected element
(image, table, text, etc.). For example, when you have some text
selected, you use this window to set the bold style and font size.
Object
Palette. This small palette window is a shortcut menu used to
place items into the current web page. For example, click on the
first icon at the top of the object palette to place an image
in the document (at the current insert location).
Site.
This window servers two main purposes. First, it shows the way
files are organized in your web site, and allows you to open files
without using the File>Open dialog. Second, it is an FTP (File
Transfer Protocol) client, which enables you to transfer your
HTML files from the computer where you create them, to the web
server where the files will be visible from the Web.
Organizination of a website:
Directory and file relationships are paramount.
Establish it properly BEFORE you begin building your site.
|
|
Week
5.2
|
Creating
a web page
Previewing
in a Browser
Page
Properties
- Title.
This text does not appear in the body of the document. It sets
the text that will be displayed in the top bar of the browser
window. You can also set the page title in toolbar of the document
window.
- Background
Image. This optional property allows you to use an image as a
repeating, tiled background for the entire page.
- Background
Color. If this property is not set, the background color of the
web page will be gray (although some web browsers will display
it as white). Set this property to control the color of the background.
Text
formatting
Making links to other web pages
Working with Images: Placing an image, adjusting the size of the
image, making an image a link, flowing text around an image, Adjusting
the margins around an image.
Web Image Types: GIF89a Format, JPEG Format, PNG Format (new)
|
|
Week
6.1
|
Designing
for different screen sizes
Your pages will be displayed on screens with a variety of screen
resolutions - from 640 horizontal x 480 vertical pixels to 1024x768
and beyond. As a designer, you need to be sure your pages will look
OK when displayed in the different circumstances your target audience
will encounter. Don't assume that everyone has the same monitor
setup that you have! For example, the monitors at the Academy are
normally set to 1024x768 pixels, yet most people on the web have
their monitors set to 800x600.
The situation is more complicated than simply screen resolution:
- Explorer
and Netscape have different amounts of space available for pages
- The user
can adjust their browser to make more or less room available (e.g.
showing or hiding different control bars) If your page needs a
vertical or horizontal scroll bar, that scroll bar takes up extra
space (12-15 pixels)
- Macs and
PCs have different amounts of space available for pages
The size recommendations
below are smaller than the actual screen size is because there is
space taken up on the screen by menus, scroll bars, buttons, and
other interface elements not on the web page. Recommended maximum
page dimensions for 640x480 screen: 610x280 Recommended maximum
page dimensions for 800x600 screen: 740x400.
Tables
Table properties:
Border, Cell Spacing, Cell Padding, Table Background color, Table
alignment (determines how text wraps around the table)
Cell properties: Cell Background color, Cell vertical and horizontal
alignment (determines how the cell contents align)
Frames
Creating and
using a "frameset"
|
|
Week
6.2
|
Presentation
of Final Projects
Discussion of
topics relating to successful website marketing: Search Engine optimization,
META code & "tags", getting sites listed in popular
directories.
Dynamic Content
and "streaming" media presentation
|
LAB
TIME
|
Students
are expected to perform 3 hours of lab time, on their own schedules,
per class meeting. But I expect that you will spend MUCH
more than that creating exquisite work that just might help get you
a job someday! |
*Course
contents may be adjusted as determined by the progress of the class.
**Due to School Holidays , there will be no class on ...
TBA
|
Project
List
|
|
The assignments:
- "Web
Site Review" (written) (10 points)
- "Music
CD Jewelbox Cover" with Photoshop 6 (10 points)
- "Make
Your Own Logo & Business Card" with Illustrator 9 (10
points)
- Object
drawn in Flash (10 points)
- Flash Motion
graphics "Logo Animation" with sound (10 points)
- Flash "menu"
and Outline / Storyboard for final website project. (10 points
each = 20 points)
- Final Project
Final Project - HTML (Dreamweaver) and Flash website (hybrids
are acceptible) presenting information relating to yourself,
your resume, portfolio, or a business interest you may have.This
site will be introduced by your Motion graphics "Logo Animation"
and contain interactive menus with sound effects to display
information and/or images. Websites must be a minimum of three
"sections/pages" not including the intro page. (20
points)
- *There
will be a written Mid-term Exam given at the begining of the
4th week. (10 points)
|
**This
syllabus is subject to change
| Missing classes
can cause you to fall behind. Therefore, please attend every class
and be on time. Students who are absent excessively will be dropped.
Attendance will be considered in the calculation of your final grade. |
|
Total
Points / Grade
|
|
100
- 90
|
A
|
Credit
|
|
89
- 80
|
B
|
Credit
|
|
79
- 70
|
C
|
Credit
|
|
69
- 60
|
D
|
No Credit
|
|
<
60
|
F
|
No Credit
|
|
Contact James Reilly  reilly@jamesreilly.com
Link
to JAMESREILLY.COM | Return
to James Reilly's SMC Info Page
Santa
Monica College | AET
|
