Course Description
Computer
Skills for Animation & Interactive Media is a class created for
students interested in the computer as a tool for digital illustration,
imaging, editing, computer animation and interactive media presentation
on the web, or via CD-Rom or DVD. This class will help students develop
a fundamental understanding of how computer graphics are created and presented.
The class will introduce a number of different graphics applications used by digital artists in graphic design studios, post-production houses, motion picture and animation studios, and website / interactive media development studios. Students will also learn the overall functions of computer hardware and software, become familiar with computer operating systems and the user interface, and learn to develop professional habits with regard to naming, using, storing and transfer of digital data.
Pre-requisites
ET11 is
open to all SMC students. Some prior knowledge or experience with computer
usage is prefered,
but not required. Those with the least computer/graphics experience will
need to spend the most time outside of the class to keep up and complete
assignments.
Lab time (outside of class) is required, and failure to spend additional time on projects and assignments will probably cause those students to fall behind or produce poor quality work and possibly risk failing the course.
Textbooks:
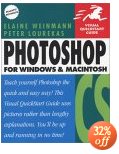
| Required:
Photoshop
CS, A Visual Quikstart Guide, Peachpit Press; |
Required: Illustrator CS, A Visual Quikstart Guide, Peachpit Press; | |
 |
 |
|
| ...or
other Photoshop manual you may already have or prefer; such as Photoshop
Bible, ect. (should be at least Photoshop 6) |
...or
other Illustrator manual you may already have or prefer; such as Illustrator
Bible, ect. (should be at least Illustrator 8) |
|
| The above books are available at the AET bookstore, any retail bookstore, or online from Amazon.com, ect. | ||
- Also Recommended:
Flash MX 2004: Graphics, Animation & Interactivity
Dreamweaver MX 2004 (or MX), A Visual Quikstart Guide, Peachpit Press; 


...or other Flash manual you may already have or prefer;
...or other Dreamweaver manual you may already have or prefer
The above books are available at the AET bookstore, any retail bookstore, or online from Amazon.com, ect.
The Complete Guide to Digital Imaging by Joel Lacey;

...or other similar introductory graphic / digital design handbook
The above book is available online from Amazon.com, ect.
Materials Needed
- 1 Zip Disk (100 MB IBM PC formatted) or...
- USB Jump Drive
Download Free Trial version of Adobe Photoshop, Illustrator and other Adobe products
Download
Free Trial version of Macromedia Flash MX 2004, Macromedia Dreamweaver
MX 2004
Schedule
|
Week 1.1 |
Intro
to Computer Graphics and Animation This week's advice: Get your books and supplies; look at digital art and animation for inspiration. Resource site of the week: Adobe Expert Center Homework: Not Yet
|
|
Week 1.2 |
Understanding
Computer Hardware and Software This week's advice: Start reading your books. You'll be amazed by the useful information you can absorb by merely perusing manuals and books on applications and techniques. Homework:
Within a limited budget (imaginary), design the best / most
productive computer for personal or professional use in the digital
art / animation production field. This will include CPU, Motherboard/Processor,
Hard Drive (speed & capacity), Other Drives, Memory, Input Devices,
Monitor and Periferals. And a computer isn't much good without software...
|
|
Week 2.1 |
Introduction
to Adobe Photoshop (chapters 1-3 in
text) A
first look at Photoshop "Filters"
|
|
Weeks 2.2 |
Getting
Familiar with Adobe Photoshop: Getting
images from the web Screen
Capture on a PC Using
a Scanner with Photoshop (CLICK HERE) Image
manipulation: More
about Layers Getting
deeper into Filters: Putting it all together: Image Compositing with Photoshop
Due Next Week > Class Assignment #3 (2rd Photoshop assignment): Create a CD cover for a real or imaginary music artist.
|
|
Week 3.1 - 3.2 |
Compositing
(combining images) with Photoshop (cont.
from week 2)
|
|
Weeks 4.1 - 4.2 |
Creating
Vector Graphics with Adobe Illustrator "Vector"
vs. "Bitmapped" Using
Illustrator to design a Business Card The
Heart of Illustrator In
the second Illustrator assignment you will create variations of
a "photo-realistic" environment using a combination of
colored shapes, and modifying them to achieve a different effect.
|
|
Weeks 5.1, 5.2, 6.1 |
Introduction
of Bonus Program(s) (i.e.: Adobe Image
Ready, Macromedia Dreamweaver, Macromedia Flash) *as class progress
permits |
|
Week
6.2
|
Presentation of Final Projects |
|
TIME |
Students are expected to perform 3 hours of lab time, on their own schedules, per class meeting. But I expect that you will spend MUCH more than that creating exquisite work that just might help get you a job someday! |

*Course
contents may be adjusted as determined by the progress of the class.
**Due to School Holidays , there will be no class on ...
Monday,
February 17 (Martin Luther King holiday)
|
Project
List
|
|
|
The assignments:
|
**This syllabus is subject to change
| Missing classes can cause you to fall behind. Therefore, please attend every class and be on time. Students who are absent excessively will be dropped. Attendance will be considered in the calculation of your final grade. |
|
||||||||||||||||||
Link to JAMESREILLY.COM | Return to James Reilly's SMC Info Page
